6 Filmmaking Drills You Wish You Had in Film School
Okay, so I didn’t go to film school. I still might. Who knows.
But I have spoken with many filmmakers who’ve attended some of the best film schools in the world. NYU, USC, UCLA, Chapman, SCAD, Columbia…the list goes on. They all say they learned the most on set or in the post-production room, where they had the chance to apply the theory they learned in the classroom.
Whether they were gaffing, directing, or sound designing at a New York film school or other top film school, they all stated that working on set is when reality started to set in that life isn’t quite like a textbook.
This post won’t tell you the best camera for filmmaking on a budget (actually it will, right here: it’s the one you can get your hands on) or how to make an actual short film, but it will provide a framework of exercises that will allow you to develop and improve upon basic storytelling skills, honing your visual acuity and understanding of things. At The Film Fund, we’re big proponents of applying theory to practice. Learn as much and as often as you can, and then go do it. But start on a micro scale.
1. Watch a scene, and then transcribe it to screenplay format.
First off, watch as many movies as you can. Don’t stress yourself out, but dedicate yourself. There was a time in college when I would watch two movies every night, usually from 10:00 PM — 2:00 AM. Not including the movies I had to watch as part of my film studies homework. Don’t go nuts, but consume consume consume. It will help you identify the types of films you like, what makes a good story, and common technical aspects the films share.
That’s more of a long-term journey. For the short-term, here’s a drill: pick a scene from a movie you want. Not a terribly long one, maybe one that’s one to two minutes. For some reason, as I’m sure many of you know, one page of a screenplay generally translates to one minute on screen. Take this scene and focus on the action, dialogue, and general setting. Play and pause the scene if you have to. Take notes on everything you think is important.
Now, take these notes and start typing them into screenplay format, using the screenwriting resources here. If done correctly, you should end up with one to two pages. If it’s too long, try paring down your action or setting sentences. See our post here for some quick screenwriting tips.
Recreating a scene will help you visualize your own scenes when crafting your stories. Rebuilding someone’s vision will help you understand the visual framework they were able to put forth. If you really want to check yourself, Google search the name of the movie followed by the word “screenplay” to try and find it, and check to see if you got close. It won’t be identical, but you should have identified the big actions, settings, and dialogue.
Try this exercise with a variety of different kinds of scenes. Action-packed, dramatic, comedic, and painful scenes will and should all read differently on the page.
2. Break down this scene to its elements, and create a list of resources you would need to recreate it.
Take the scene and reduce it to its individual elements. You should do this both by watching the scene as well as reading the script you just wrote. On the page, circle everything that you might need someone’s help with creating. Props, sounds, characters, locations, vehicles, buildings, wardrobe.
Now create a separate list with two columns. In the left column, list out all of the things you’d need. On the right, list what you’d need to do to realize this element. If there’s a certain sound effect or type of music you’re not sure how to create on your own, match this element with a composer/sound designer. If there’s an elaborate medieval costume with which you don’t want to look amateurish, match this with a costume designer. See the example below:
Element
Classical music
80s horror synth music
Detailed 18th century outfit
Francie (burlesque dancer, mid 70s)
Cozy fireplace
Resource
Online search
Composer
Costume designer
Backstage.com
My cousin’s living room
3. Record a friend answering nonsensical questions, and create a dramatic story from the audio.
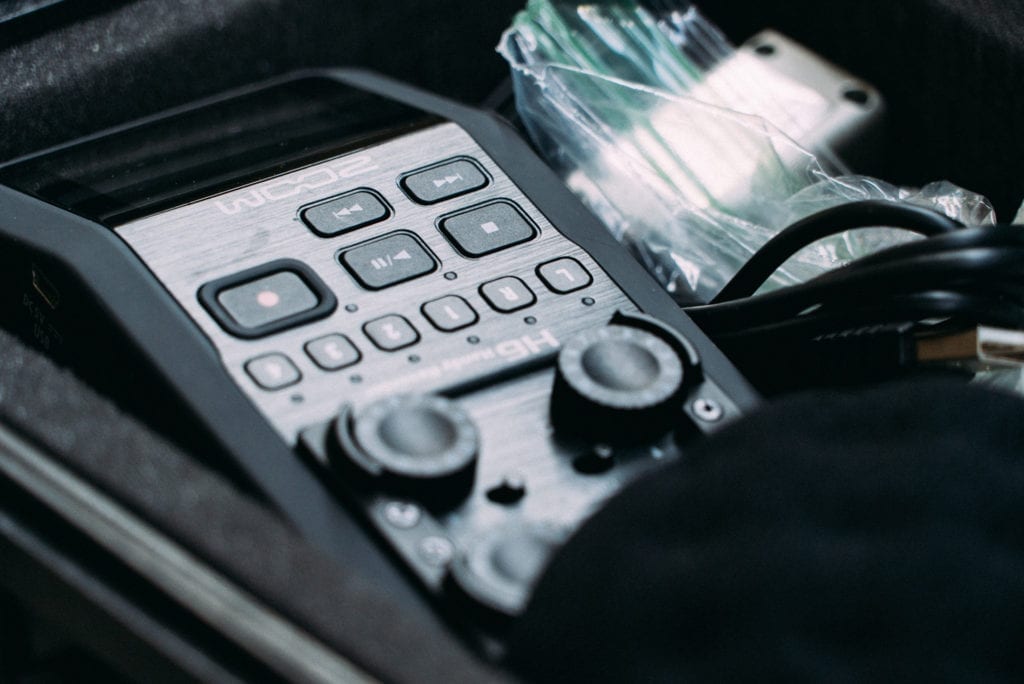
This drill requires some gear. Since it’s a technical exercise, we recommend getting a pair of over-ear headphones, an external recording device, and a shotgun or lavalier microphone. In practice, especially for documentaries or ultra-low budget productions, any recording gear you can get your hands on will do the job, even if it’s a smartphone with a headphone mic plugged in. But this drill is specifically for audio recording, so try to get some gear either from a friend, library, school, or maybe a company like KitSplit.
Example of products (no affiliate links or sponsorship here):
- Zoom recorder
- Sony MDR headphones
- Rode NTG-2 shotgun microphone and pistol grip
- Any brand lavalier mic
You can use any brands you’d like. These are just a few examples I thought of quickly. All you really need is a recording device on which you can adjust the levels and gain (how sensitive the microphone is), a microphone, and a pair of headphones to monitor the sound.
Now that you’ve (hopefully) got a handle on your gear, write down five questions that will require detailed answers. They don’t have to be about anything meaningful, just things that will take someone a while to answer. You want questions that won’t require you to ask any type of follow-up questions so you can concentrate on and monitor the live audio the entire time. Print out these questions. Some examples:
- Tell me a story from college that made you see the world differently
- Why do you think some people are evil, some people are good, and some people just don’t care?
- Try and name fifteen different kinds of cheese, and then tell me your top three and why.
- What are your favorite condiments, and why do you think condiments exist in the world?
Grab a friend and record their answers. Make sure to get a separate track for room tone. Then import the audio into your editing software and see how it came out. Play around with cutting the audio into different sections and trimming out unnecessary content or pauses.
Make a story out of the nonsensical questions. Set it to music or stock footage. Go nuts. If you create something really cool, send it to us!
4. Look at stills from a particular movie, and identify the source of light.
When I bought some of my first lighting equipment packages and camera, I took some lighting and composition courses offered by the camera store. My instructor lit a lot of sets for food shows for big television networks. Needless to say, I got a crash course in professional set lighting.
While he primarily lit food, the guy did something at first that surprised me. He sat me down at a computer and started searching for stills from Breaking Bad.
He then had me identify from where the sources of light eminated in each scene. Was there a light coming through a window, mimicing sunlight? Is there a practical light, a floor lamp maybe, in the middle of the scene, and are there any other lights? Is the lighting hard or soft? Are they using gels or colored LEDs to manipulate the color temperature? What are they trying to accomplish with this lighting?
In your house or apartment, light a similar scene to one you’ve found online. It can even be a simple interview setup. If you don’t have access to film or photography lighting, use practical lights such as lamps and ceiling lights to achieve an effect you want. Just make sure the bulbs are the same kind of temperature (incandescent vs. LED, for example).
5. Direct a real scene from a film you like.
Choose a monologue scene from a movie you like. One that isn’t super popular, with which the majority of people wouldn’t be familiar. Now take this scene and Google search it along with the word “monologue.” Recite it to yourself in the mirror, over and over until you are one with the monologue. You don’t need to memorize it. Just feel it, and understand it deeply and emotionally. Print out a few copies.
Now grab a friend. Preferably someone who doesn’t have a ton of acting experience. Working with non-actors will teach you patience, and it will force you to get creative with your direction.
Have the person recite the monologue to you once. Tell them it was good, but you want them to make a few tweaks to their performance to convey a different kind of emotion, Give them commands to try and tweak their performance into the kind of emotion you want to elicit. Depending on the mood of the material, these commands could be gentle, firm, or even angrily commanded. Everyone directs differently. Some like to mimic the lines for the actor themselves (I try to shy away from this method, or at lest keep it as a last resort just to showcase which part of the dialogue I want emphasized and let the actor bring their own style). Some directors like to ask actors questions about their lives, some like to compare the style they want to other movies.
Use whatever works for you in maintaining a trusting relationship with your actor. Directing is about building trust with your cast and crew so they can accomplish your vision. in this case, your vision is to recreate the performance in the original monologue.
6. Create a montage.
If you really want to try an advanced exercise, go back and film everything you’ve done in the first five drills. Make sure they’re all well-lit with clean audio, and that you’ve gotten performances that will help you tell a story.
Put all the audio and video footage into editing software.
Got an idea for a pitch but need funding to make your short film? Check out our film funding opportunities.